|
|
|
|
|
|
|
|
|
|
|
|
|
|
|
|
|
|
|
 If you find this information useful then  and like us on
|
|
|
Determine whether or not you are willing to pay $150.74 for this. The hard vinyl on mine was poking me such that it reminded me of the Adam Sandler song, POS Car. |

|
|
Once you determine whether you are willing to buy a new seat from the manufacturer, ask yourself if you are still willing knowing the price does not include any of the mounting hardware, which you will have to buy because the attachment hardware was too rusted to remove without damaging it. So I had to cut the mounting hardware off the old seat (see red arrows - you can see the line where it was cut. This picture already shows the completed assembly.) |

|
|
Determine what seat you want to use as a replacement. It almost does not matter what kind you want. I got this from a Chevy Cavalier at my local boneyard which they sold for $40. I took the passenger-side seat because it had less wear. |

|
|
Since car seats were not designed for riding mowers, you will have to make some kind of adapter out of metal bars or sheet metal. I used a piece of sheet metal from our old dishwasher which went between the new seat and the mounting hardware. I welded the old mounting hardware to the adapter (red arrows above) and drilled holes compatible with the new seat (green arrows to the right) and used some 5/16 nuts and bolts I had handy. |
 |
|
When you [re]assemble the wheelbarrow, use these large fender washers on either side of the plastic bin to reduce the chance the bin will fracture in the first place. Once the new seat <-> adapter <-> mounting hardware assembly is complete, all that remains is attachment at the original points (blue arrows.) |
 |
|
Doesn't everyone's riding mower have reclining bucket seats? |


|
|
When you purchase a wheelbarrow with wooden handles such as this one, purchase it unassembled. You will save $10-$15 off the bat depending on where you buy it, and you will be able to treat it prior to assembly. First thing you want to do is paint the handles with two coats of a good exterior paint. This will prevent the rot that occurred at the point where the bin is mounted to the handles. Also you get to choose the color which may be important if you run a business and you want the color to match your company colors. Fortunately we caught the problem with this one before it rotted through. If you already have some rot, scrape the rot out and dry the area thoroughly. We tried two different products and do not yet have a comparison which is better. We filled a smaller hole with Minwax wood filler and a slightly larger hole with auto body filler. |

|
|
The reason we discovered the rot in the first place is the plastic bin fractured right around the point where the carriage bolts secured the bin to the handles. |

 |
|
Two of the four bolts broke when we tried to separate the nut from the bolt. When you do the assembly, you can treat the bolts with anti-seize lubricant so if you do have to take the wheelbarrow apart, you can do so easily. |

 |
|
These metal pieces rusted through. There is no repair for this. It is not worth trying to weld. I will be using some of the scrap metal pieces to replace the rusted parts. If you purchase this kind of wheelbarrow, I suggest treating each piece of metal with two coats of good auto body primer, then paint with the color of your choice. Some people use old motor oil to preserve metal. The oil idea might not work for your particular application. |
 |
|
When you [re]assemble the wheelbarrow, use these large fender washers on either side of the plastic bin to reduce the chance the bin will fracture in the first place. One thing you *might* try is ask the place you buy your wheelbarrow if they will do these modifications for you before and during assembly. Even if they agree to do it and you supply the extra materials, I can not imagine what they would charge. They would have to leave the wooden handles somewhere to dry after each coat of paint and most hardware stores are not equipped to do that. If you live in the southern NH or northeast MA area, I could do this assembly for you for $50 plus materials. This does not include rot repair disassembly and reassembly. This is only for preventive assembly. |
 |
|
HOW-TO TIP - November 15, 2011 How to grow an indoor vegetable garden Click on any picture to enlarge it:  This is just the start. Obviously we will keep you posted throughout the winter along with successes [and hopefully not failures.] |
Richard, what do I do when my zucchini leaves look like this?
Click on any picture to enlarge it:


|
|
The above condition is happening to my zucchini plants. Now depending on who one talks to, the cause is either a fungus or some kind of a beetle that bores in to the
main stem and causes it to flatten out. Some of the stems on my plants are flattened and some are not, but all plants show some degree of degradation. I am going to
start by treating for fungus using a recommended copper-based fungicide (sometimes called "copper soap") as soon as the rain lets up. It is supposed to rain today and
tomorrow so I will probably start treating on Wednesday and will let you know if it works. If not, then I will try one of the remedies for the various insects that might be
responsible (but I have neve seen.) It might be a combination of both things so I may end out treating for both. Stay tuned for the verdict. UPDATE 11/14/11 The verdict? I do not know what happened. I tried one treatment, then the other. One thing not previously mentioned; when we got back from a four day vacation at the end of June, we found something had chewed almost all the leaves off the zucchini plants. I thought that was the end of them, but some new leaves started sprouting and I thought there might be hope. But even with the installation of the scarecrows, the new leaves started shriveling like the pictures you see above. Let's hope for better next year. I will continue with updates on this issue. |
Build your own automatic plant watering system for next-to-nothing
| Scroll down for the updates... |
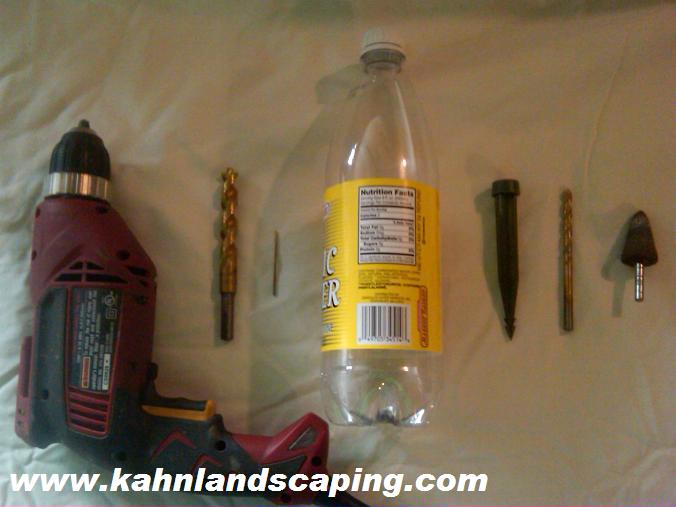 Tools and materials you will need: Power drill, 1/2" drill bit, 1/16" drill bit, 1-liter soda bottle, water pick.
You may use a 2-liter soda bottle but we advise you not to fill the bottle more
than half full otherwise the system may tip over, depending on the consistency of the soil.
Also, if you are using this system in a small pot, you could use a smaller (i.e. 20 oz.) bottle in
order to avoid tipping the whole pot over!)
Tools and materials you will need: Power drill, 1/2" drill bit, 1/16" drill bit, 1-liter soda bottle, water pick.
You may use a 2-liter soda bottle but we advise you not to fill the bottle more
than half full otherwise the system may tip over, depending on the consistency of the soil.
Also, if you are using this system in a small pot, you could use a smaller (i.e. 20 oz.) bottle in
order to avoid tipping the whole pot over!)Recommended tools: 1/4" drill bit, die grinder bit or round file. The only thing that may cost you money (unless you have to buy the tools) is the water pick. I bought them for 20 cents apiece at Anne's Country Florals. You may also buy them from us for the same price [which does not include a minimum shipping charge of $3.31 or pick up for free.] |
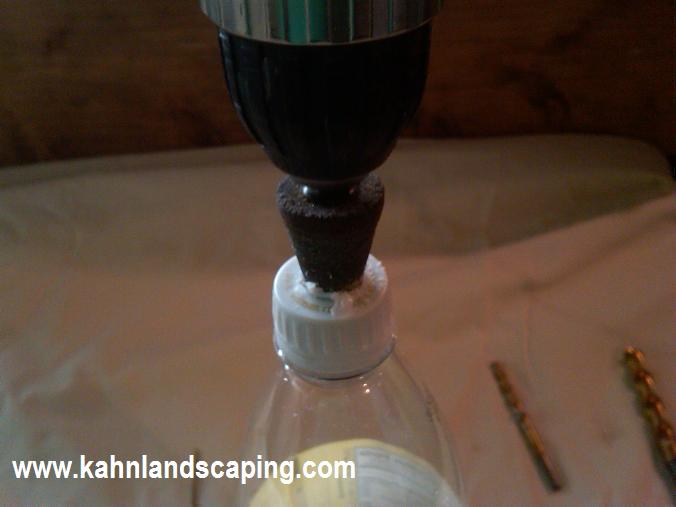
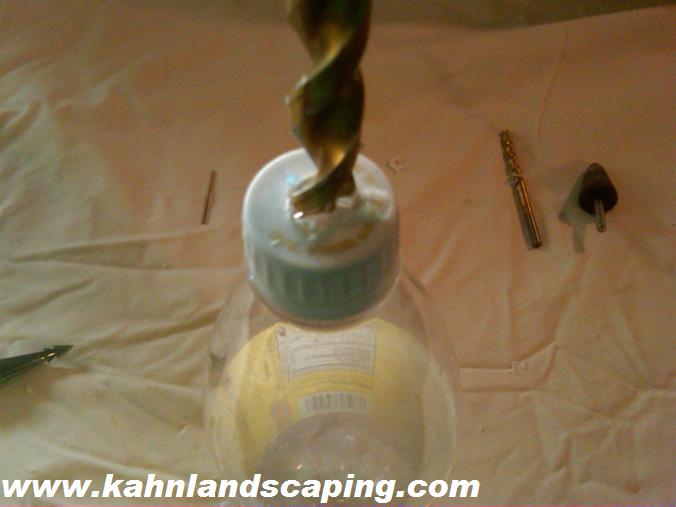 First, drill a 1/2" hole in the bottle cap while the cap is on the bottle. You may want to drill a 1/4" pilot hole first as some bottle
caps may break apart if you try to force a 1/2" hole right away.
First, drill a 1/2" hole in the bottle cap while the cap is on the bottle. You may want to drill a 1/4" pilot hole first as some bottle
caps may break apart if you try to force a 1/2" hole right away.
|
 Second, see if the water pick fits in the hole snugly but not too tight. If the water pick is too loose then the setup will leak.
If the water pick does not fit at all then you need to widen the hole gradually. I recommend the die grinder bit over hand-filing
because evenness is key to a leak-free setup. Here's the 4/5/12 update:
First, I use a different die grinder bit, that is, one that is almost exactly the right size for the floral spikes, so when the
top of the bit is flush with the top of the cap, the hole is almost exactly the right size. Second - and here is the most
important part of all - rather than widen the holes on a whole bunch of bottle caps and then put the spikes in, put the spike
in each hole as you make it. Widening the hole with the die grinder bit melts the plastic just a little. Putting the spike
in right away makes for an easier fit. Then as the plastic of the cap cools, it shrinks a bit, making the seal even tighter.
Second, see if the water pick fits in the hole snugly but not too tight. If the water pick is too loose then the setup will leak.
If the water pick does not fit at all then you need to widen the hole gradually. I recommend the die grinder bit over hand-filing
because evenness is key to a leak-free setup. Here's the 4/5/12 update:
First, I use a different die grinder bit, that is, one that is almost exactly the right size for the floral spikes, so when the
top of the bit is flush with the top of the cap, the hole is almost exactly the right size. Second - and here is the most
important part of all - rather than widen the holes on a whole bunch of bottle caps and then put the spikes in, put the spike
in each hole as you make it. Widening the hole with the die grinder bit melts the plastic just a little. Putting the spike
in right away makes for an easier fit. Then as the plastic of the cap cools, it shrinks a bit, making the seal even tighter.
|
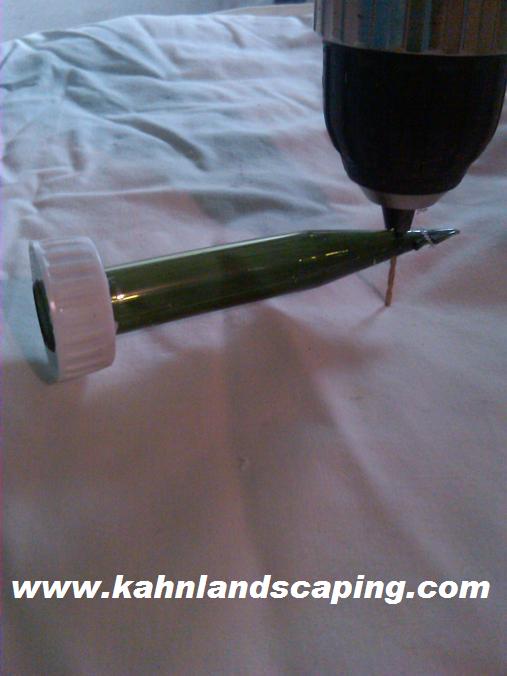 Third, drill a 1/16" hole through near (but not at) the tip of the water pick. This will create two holes. For most potted plants
this is all you will need to do. If the soil in question is very hard packed, you may need to drill another set of holes slightly
further away from the tip and at right angles to the first set of holes. It is better to have too few holes and drill more than
drill too many right off the bat. Test the flow rate before drilling any new holes.
Third, drill a 1/16" hole through near (but not at) the tip of the water pick. This will create two holes. For most potted plants
this is all you will need to do. If the soil in question is very hard packed, you may need to drill another set of holes slightly
further away from the tip and at right angles to the first set of holes. It is better to have too few holes and drill more than
drill too many right off the bat. Test the flow rate before drilling any new holes.
|
|
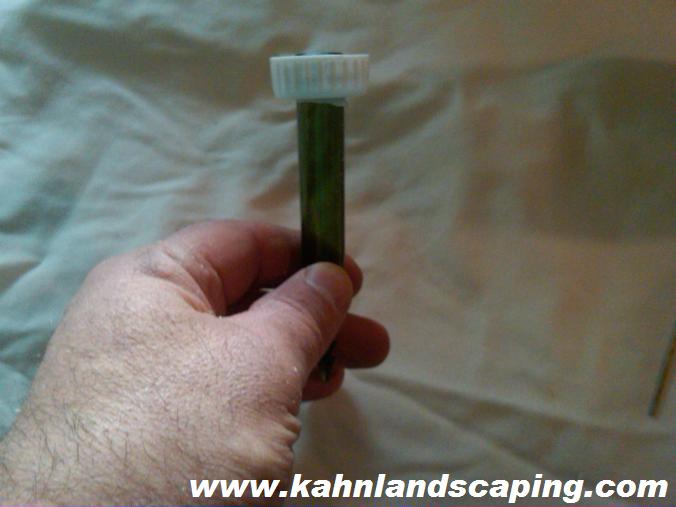
Fourth, assemble the cap and water pick by inserting the water pick from the inside of the bottle cap.
No adhesive or caulk should be necessary.
|
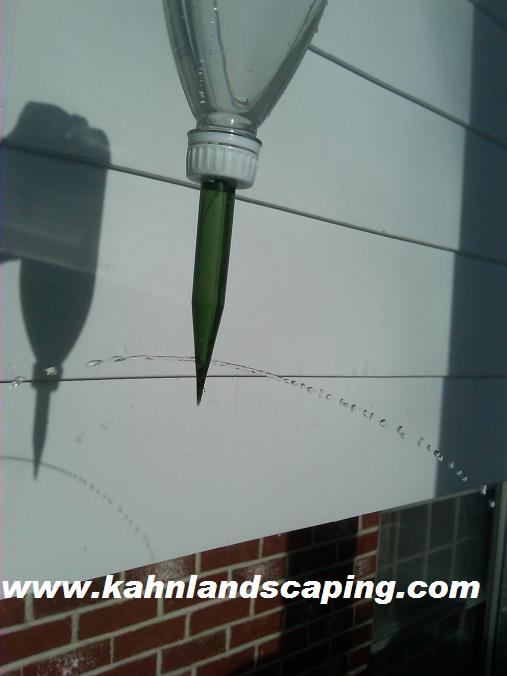 Fifth, fill the bottle and screw the cap and water pick assembly onto it. Hold it upside down over a sink or outdoors to see if you get water
flow and no leakage around the cap and water pick assembly. Do not worry about the flow rate being too fast here. The water
will flow faster when there is no soil to slow it down.
Fifth, fill the bottle and screw the cap and water pick assembly onto it. Hold it upside down over a sink or outdoors to see if you get water
flow and no leakage around the cap and water pick assembly. Do not worry about the flow rate being too fast here. The water
will flow faster when there is no soil to slow it down.
|
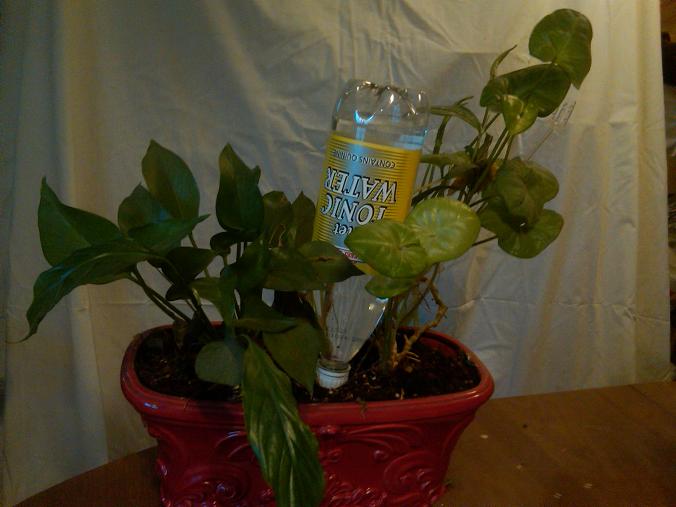 Sixth and finally, refill the bottle, screw the cap assembly on tight and test it in a pot with soil and no plant in case you are concerned.
Do not place the assembly too close to the plant stem in order to avoid root damage.
Sixth and finally, refill the bottle, screw the cap assembly on tight and test it in a pot with soil and no plant in case you are concerned.
Do not place the assembly too close to the plant stem in order to avoid root damage.(Note: if this is too much aggravation for you, we will build a unit for you for just $5.99, parts and labor, regardless of bottle size. Shipping would be extra.) |
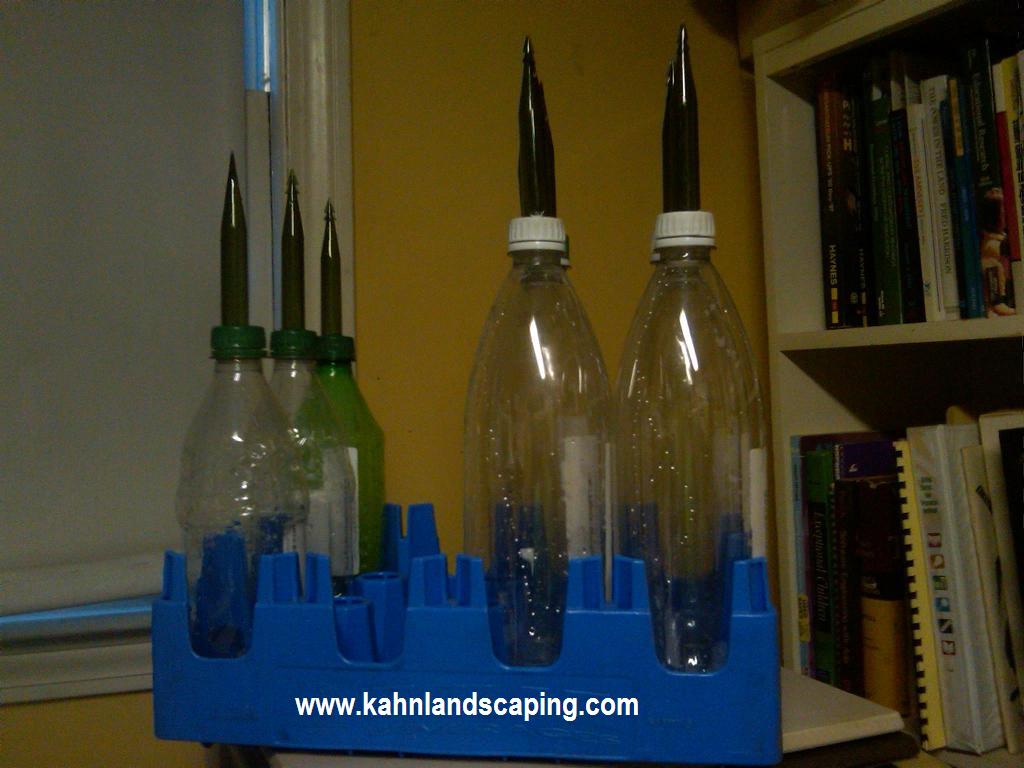 Here is an array of 20 ounce and 1 liter size automatic plant-watering systems. I tipped over a smaller pot attempting to use the 1 liter system and said,
"I guess this calls for a 20 ounce bottle." Of course you can use even smaller bottles as long as the cap is at least the same size as those in larger bottles.
The cap doesn't even have to be standard as long as it is big enough and can form a watertight seal when closed.
Here is an array of 20 ounce and 1 liter size automatic plant-watering systems. I tipped over a smaller pot attempting to use the 1 liter system and said,
"I guess this calls for a 20 ounce bottle." Of course you can use even smaller bottles as long as the cap is at least the same size as those in larger bottles.
The cap doesn't even have to be standard as long as it is big enough and can form a watertight seal when closed.
|
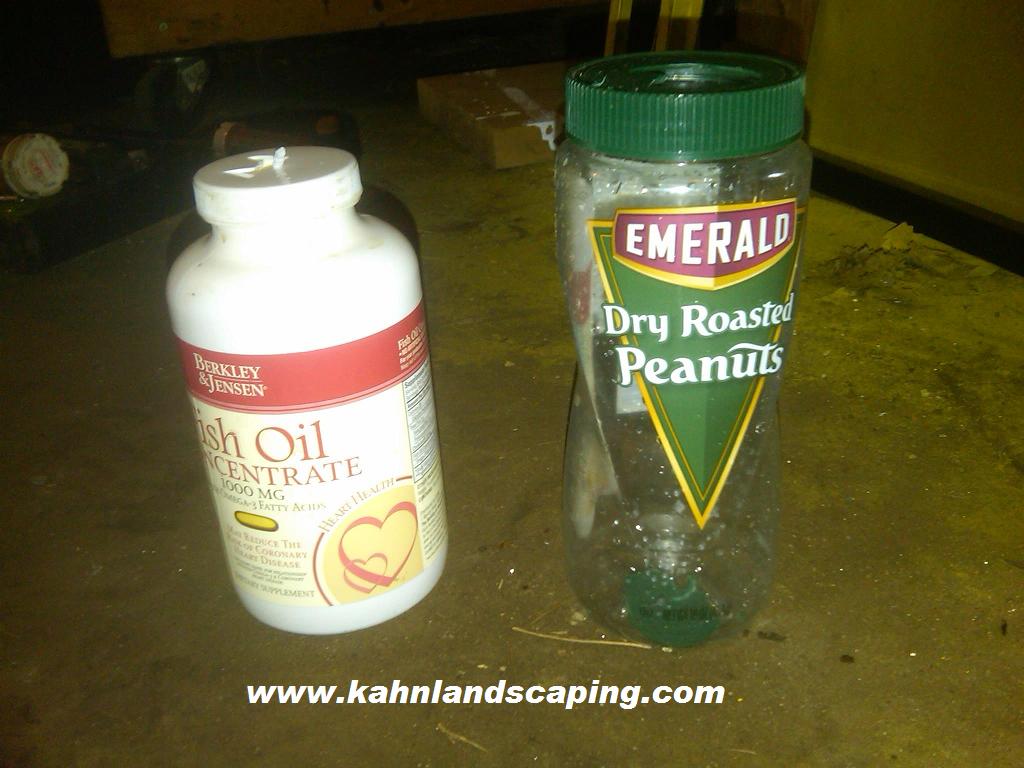
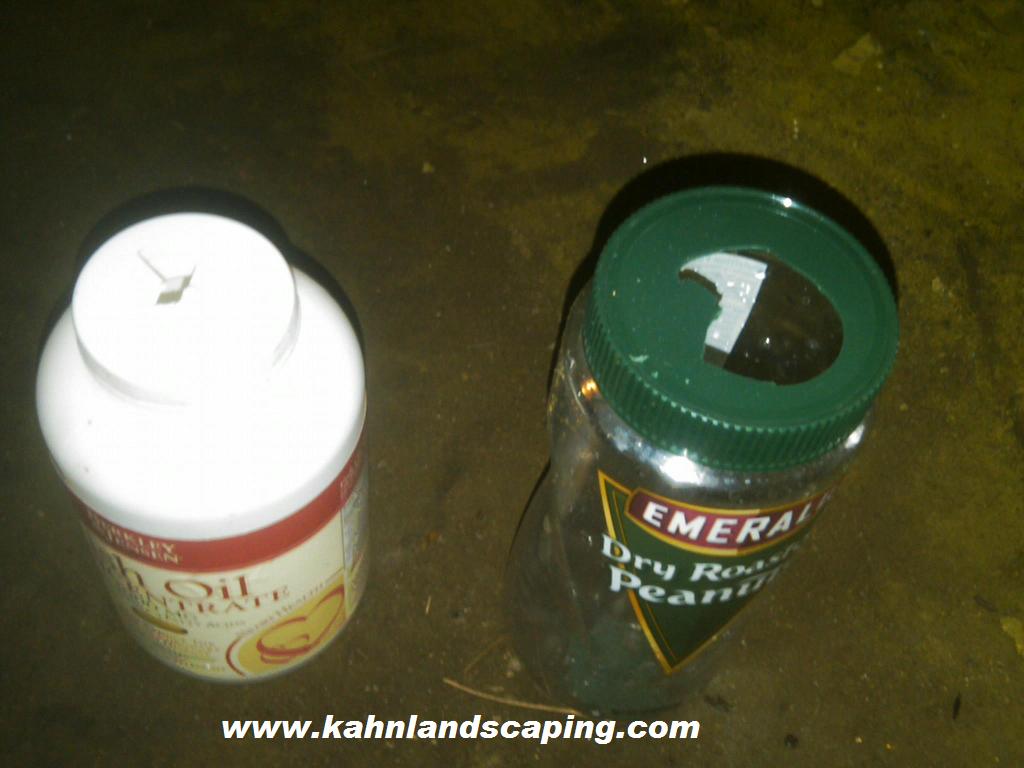 Updates as of 4/24/11...you can use virtually anything for your automatic plant-watering system. For some reason, other plastic container lids crack more easily
than the soda bottle caps. These two container lids cracked as soon as the 1/2" drill bit was introduced, despite a 1/4" pilot hole being drilled first.
Updates as of 4/24/11...you can use virtually anything for your automatic plant-watering system. For some reason, other plastic container lids crack more easily
than the soda bottle caps. These two container lids cracked as soon as the 1/2" drill bit was introduced, despite a 1/4" pilot hole being drilled first.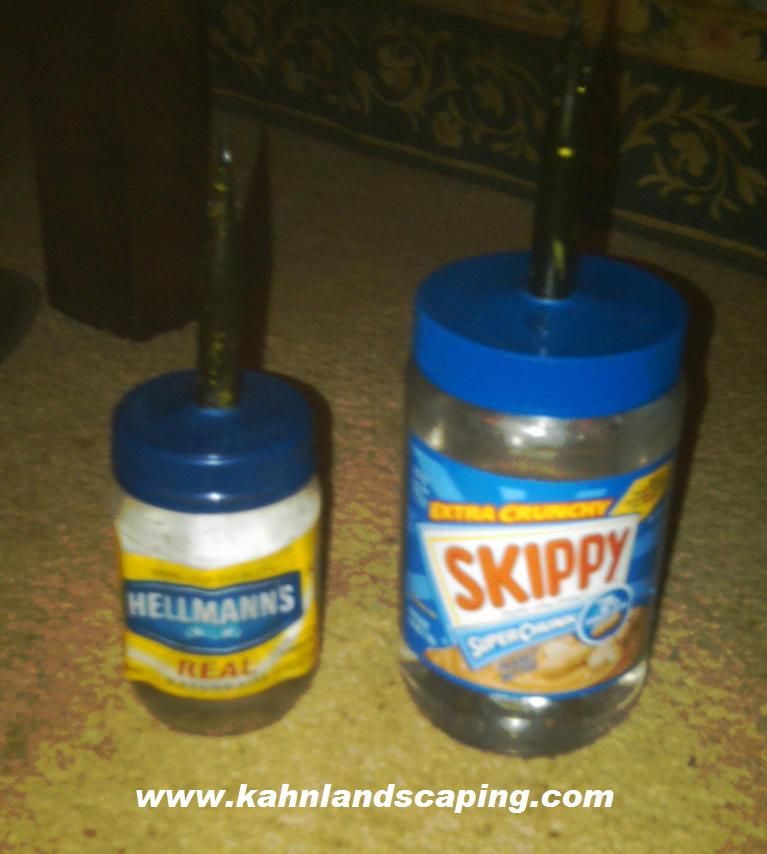 So what I did was start with the 1/4" hole as usual and went straight to the die grinder bit to widen the hole gradually and...guess what? But be sure to clean the
container thoroughly, because as far as I know, peanut butter and mayonnaise do not make for good plant food.
So what I did was start with the 1/4" hole as usual and went straight to the die grinder bit to widen the hole gradually and...guess what? But be sure to clean the
container thoroughly, because as far as I know, peanut butter and mayonnaise do not make for good plant food.
|
Question experienced November 12, 2010
Why is it so important to keep your shrubs and ornamental trees pruned back?
See for yourself. Click on any picture to enlarge it:
 This is a "before" shot. Doesn't look too bad, but... |
 One of these arbor vitae has started to encroach on the power lines |
 When you finally do get around to pruning them back you can't help the bare spot at the top which wouldn't happen if you kept up with the pruning at least once per year |
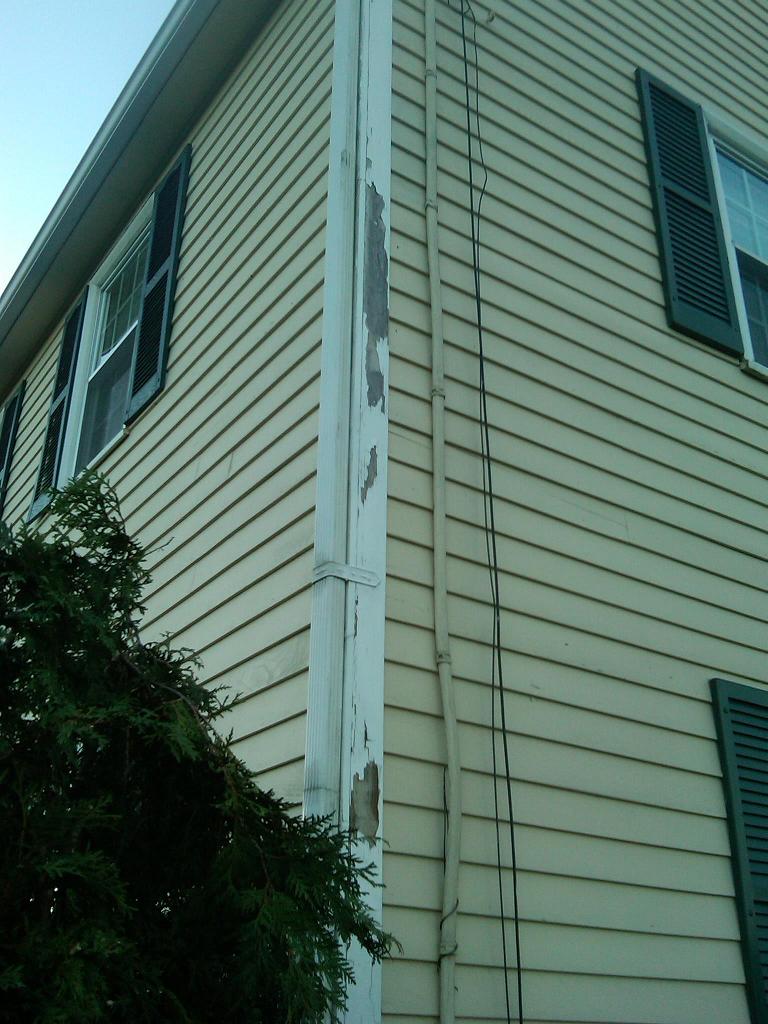 And this is the most important reason, especially if you have natural siding as this customer does. By not keeping your trees pruned back off your house, a condition is set up where rot can occur and flourish. Repairing this damage is a lot more expensive than keeping trees and shrubs off the house. |
|
Question submitted September 3, 2010 6:19 PM EST Richard, which is better? Sod, hydroseed, or traditional loam/seed/fertilizer? The simple answer: not one of them is "better" than the other. The quality of the lawn would be the same assuming each is properly applied and maintained. The timing of this question could not be better, as we just completed a job planting a lawn on an area formerly occupied by an above-ground swimming pool. Coincidentally, the neighbor right next door just had some work done and had their front yard hydroseeded. I have yet to ask exactly when the hydroseed mixture applied, but I think I will wait until I see some germination. So how do you choose? Let's look at each option: 1. Sod - if you want a lush, green lawn, you want it now, and you are willing to pay for it, then sod is the way to go. Sod is usually delivered in big rolls of turf about 1.5 feet wide and is literally laid out like a carpet. Don't even think about buying sod unless you plan to water religiously every day. If you don't it will die as quickly as another type of turf will grow when properly watered. 2. Hydroseed - the only advantage of hydroseed over traditional seed/fertilizer/loam is it is quicker for the landscaper to apply it. Hydroseeding consists of mixing seed, fertilzer, water, and tack in a mixing machine. The operator then sprays the mixture over the area to be seeded. The tack is what holds the seed in place and gives a bluish-green appearance. It looks like someone spray-painted the hydroseeded area but the coloring is functional as it gives the operator a visual cue as to which area has been seeded and which area is still bare. 3. Traditional - This takes the longest to apply but requires the least expensive investment in equipment. All three lawn methods require a good base of fertile loam, though sod requires a little less. With traditional lawn growth methods, once the loam is properly graded, seed and fertilizer is applied and raked in. Then the area is compacted with a heavy roller [not a steam roller!] The one we use weighs about 330 lbs when filled with water. A strong person can manually push the roller on flat ground but the roller can be pulled with an ordinary lawn tractor. |
|
Question submitted July 25, 2010 at 2:31 PM EST Richard, what do the three numbers on a bag of fertilizer mean? The three numbers on a bag of fertilizer are the N-P-K numbers, in that order. N-P-K stands for nitrogen, phosphorous, and potassium, respectively. K is first letter of the old Latin name for potassium. Nitrogen supports leaf growth, phosphorous supports root development, and potassium helps fight disease. You need to choose a fertilizer wisely, including knowing the correct NPK for a particular application. What makes a good fertilizer for lawns might not make a good fertilizer for vegetables. Also organic fertilizers may have lower numbers but may be just as effective for particular applications as they may contain microorganisms and other things that can't be measured in a test tube. Other factors need to be considered as well, such as soil pH, or degree of acidity or alkalinity. Question submitted July 25, 2010 at 2:39 PM EST We had some tree work done in our front yard. Now we can't get grass to grow where the truck has been. Why is that? This happens because the weight of the truck damages the roots of the grass, so simply fertilizing the area won't help. The damage may be repaired one of two ways: 1) run a roto-tiller over the damaged area to break up the soil and use a metal rake to smooth it out, or 2) put down a layer of soil over the damaged area. Then put down the appropriate seed and rake it in. Keep in mind, if you had trees removed, then an area that used to be shaded may now be sunny which will require a different type of seed. |
Serving the communities of Hudson, Litchfield, Nashua, Windham, Pelham, and Londonderry, NH, and Tyngsborough, Dracut, and Methuen, MA.
If you don't see your community listed, please give us a call.